As with all environments, including Dev, you want to ensure that whatever is running on said environment is operating at the utmost performance. Not only will it make the application stack more reliable, but it’s less calls at 2:00 AM for the engineers on-call and less support tickets from angry customers using your application.
In this blog post, you’ll learn about the three key ways to optimize performance across all fronts with Karpenter, Kubecost, and Stormforge.
To follow along from a hands-on perspective with this blog post, you’ll need to sign up for the 30-day StormForge trial.
When you think about performance optimization, you may be thinking “Why do I need three tools?”, and you’re absolutely right. Technically, you don’t. You could use Stormforge for all three needs (Stormforge can work directly with the Cluster Autoscaler). However, when implementing tools and platforms, the key is to ensure that what you’re implementing is the best for the job. That’s why implementing open-source tools like Kubecost and Karpenter to add value makes sense.
Let’s break down what each is for.
First, there’s Karpenter. Karpenter will be used for scaling nodes up and down in the most performant way possible. If you’re wondering why you wouldn’t just use Cluster Autoscaler because it’s built in, you absolutely can, but it’s slower. From a performance benchmark perspective, Karpenter wins in terms of getting nodes up and bringing them down faster.
Next, there’s Stormforge. Stormforge will take care of the resource optimization for resources running on the cluster. It’ll manage the memory and CPU needs of the workloads. It can take care of all Requests and limits. Karpenter takes care of the infrastructure and Stormforge takes care of the workloads.
Lastly, there’s Kubecost. Kubecost takes care of… you guessed it, the cost. It ensures that cost optimization is properly implemented within your Kubernetes environment for both the cluster itself and the the workloads running within the cluster. It’ll give you suggestions on what can be optimized to save money and still perform as well as before.
Learn more about the benefits of combining StormForge and Kubecost in our guide to Kubernetes optimization. You can walkthrough getting a snapshot of savings before optimization in Kubecost, optimizing a workload with StormForge, and seeing those costs go down in Kubecost.
The overall installation and configuration for Karpenter takes three key steps:
In this section, you’re going to learn how to set up all three to ensure Karpenter is properly running within your environment.
First things first – Karpenter needs permissions to scale up and scale down Worker Nodes. It doesn’t have the permission needed out of the box, so during the installation, you’ll point Karpenter to the proper IAM Role.
First, create a policy that uses the same config in the policy.json below.
{
"Statement": [
    {
        "Action": [
            "ssm:GetParameter",
            "iam:PassRole",
            "ec2:DescribeImages",
            "ec2:RunInstances",
            "ec2:DescribeSubnets",
            "ec2:DescribeSecurityGroups",
            "ec2:DescribeLaunchTemplates",
            "ec2:DescribeInstances",
            "ec2:DescribeInstanceTypes",
            "ec2:DescribeInstanceTypeOfferings",
            "ec2:DescribeAvailabilityZones",
            "ec2:DeleteLaunchTemplate",
            "ec2:CreateTags",
            "ec2:CreateLaunchTemplate",
            "ec2:CreateFleet",
            "ec2:DescribeSpotPriceHistory",
            "pricing:GetProducts"
        ],
        "Effect": "Allow",
        "Resource": "*",
        "Sid": "Karpenter"
    },
    {
        "Action": "ec2:TerminateInstances",
        "Condition": {
            "StringLike": {
                "ec2:ResourceTag/Name": "*karpenter*"
            }
        },
        "Effect": "Allow",
        "Resource": "*",
        "Sid": "ConditionalEC2Termination"
    }
],
"Version": "2012-10-17"
}
This policy will ensure that Karpenter has the right permissions.
Next, create the policy.
aws iam create-policy --policy-name KarpenterControllerPolicy --policy-document file://policy.json
After the policy is created, ensure that the OIDC provider is active and ready to use AWS IAM.
eksctl utils associate-iam-oidc-provider --cluster k8squickstart-cluster --approve
Lastly, add the service account with the policy to your cluster.
eksctl create iamserviceaccount
  --cluster "k8squickstart-cluster" --name karpenter --namespace karpenter
  --role-name "KarpenterInstanceNodeRole"
  --attach-policy-arn "arn:aws:iam::912101370089:policy/KarpenterControllerPolicy"
  --role-only
  --approve
Now that the policy is ready, you can start the installation process for Karpenter.
First, configure a few environment various which contain:
An example is below.
export CLUSTER_NAME="k8squickstart-cluster"
export KARPENTER_IAM_ROLE_ARN=
export CLUSTER_ENDPOINT=
Next, install Karpenter with the associated environment variables.
helm upgrade --install --namespace karpenter --create-namespace
karpenter karpenter/karpenter
--set serviceAccount.annotations."eks.amazonaws.com/role-arn"=${KARPENTER_IAM_ROLE_ARN}
--set clusterName=${CLUSTER_NAME}
--set clusterEndpoint=${CLUSTER_ENDPOINT}
--set aws.defaultInstanceProfile=KarpenterNodeInstanceProfile-${CLUSTER_NAME}
Lastly, install the Karpenter CRD’s.
kubectl apply -f https://raw.githubusercontent.com/aws/karpenter/main/pkg/apis/crds/karpenter.sh_nodepools.yaml
kubectl apply -f https://raw.githubusercontent.com/aws/karpenter/main/pkg/apis/crds/karpenter.sh_nodeclaims.yaml
kubectl apply -f https://raw.githubusercontent.com/aws/karpenter/main/pkg/apis/crds/karpenter.k8s.aws_ec2nodeclasses.yaml
You’re now ready for the Karpenter configuration.
Once Karpenter is installed, you’ll then need to configure it for the Worker Nodes that you want it to manage as Karpenter doesn’t do this out of the box.
As an example, the configuration below sets up Karpenter to manage Linux-based nodes that are of instance type A or M.
Ensure that you specify the IAM Role name that you created for the config below.
kubectl apply -f - <<EOF
apiVersion: karpenter.sh/v1beta1
kind: NodePool
metadata:
  name: default
spec:
  template:
    spec:
      requirements:
        - key: kubernetes.io/arch
          operator: In
          values: ["amd64"]
        - key: kubernetes.io/os
          operator: In
          values: ["linux"]
        - key: karpenter.sh/capacity-type
          operator: In
          values: ["spot"]
        - key: karpenter.k8s.aws/instance-category
          operator: In
          values: ["a", "m"]
        - key: karpenter.k8s.aws/instance-generation
          operator: Gt
          values: ["2"]
      nodeClassRef:
        name: default
  limits:
    cpu: 1000
  disruption:
    consolidationPolicy: WhenUnderutilized
    expireAfter: 720h # 30 * 24h = 720h
---
apiVersion: karpenter.k8s.aws/v1beta1
kind: EC2NodeClass
metadata:
  name: default
spec:
  amiFamily: AL2
  role: "KarpenterNodeRole-k8squickstart-eks"
  subnetSelectorTerms:
    - tags:
        karpenter.sh/discovery: "k8squickstart-eks"
  securityGroupSelectorTerms:
    - tags:
        karpenter.sh/discovery: "k8squickstart-eks"
EOF
You can then test out the configuration to ensure that proper scaling takes place.
Deploy a test workload.
kubectl apply -f - <<EOF
apiVersion: apps/v1
kind: Deployment
metadata:
  name: inflate
spec:
  replicas: 0
  selector:
    matchLabels:
      app: inflate
  template:
    metadata:
      labels:
        app: inflate
    spec:
      terminationGracePeriodSeconds: 0
      containers:
        - name: inflate
          image: public.ecr.aws/eks-distro/kubernetes/pause:3.7
          resources:
            requests:
              cpu: 1
EOF
Scale the workload.
kubectl scale deployment inflate --replicas 5
Check to ensure that Karpenter is working as expected.
kubectl logs -f -n "${KARPENTER_NAMESPACE}" -l app.kubernetes.io/name=karpenter -c controller
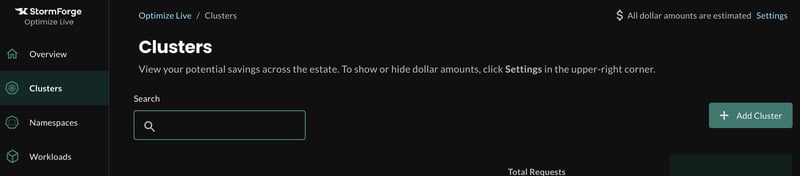
Now that the Karpenter configuration is complete, you’ll implement the workload optimization piece, Stormforge. In the prerequisite section of this blog post, you went through the necessary prerequisites to sign up for Stormforge.
Once you’re signed in, you’ll see a screenshot similar to the one below.
Click the green + Add Cluster button.
Next, go through the steps of putting in information about your cluster.
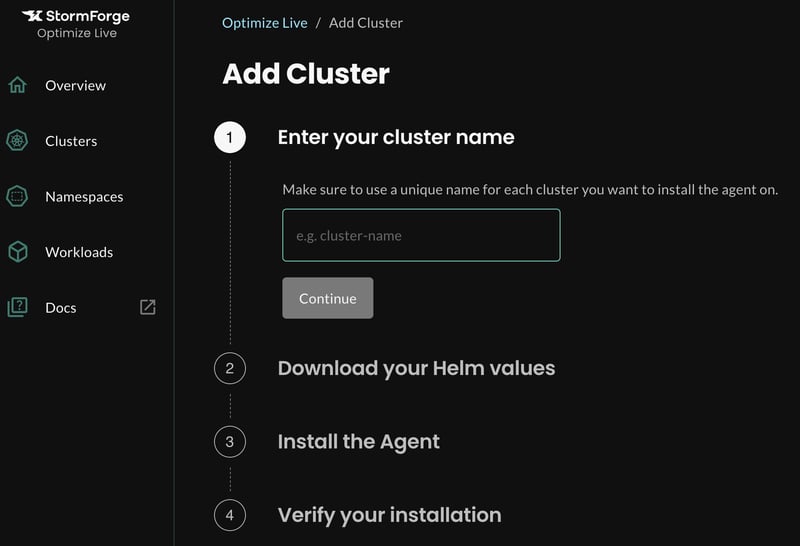
You’ll reach a point where you need to download a values.yaml file which will contain the credentials Stormforge needs to have permissions to your Kubernetes cluster. Save the output in a values.yaml file.
clusterName: karpentertest
stormforge:
  address: https://api.stormforge.io/
authorization:
  issuer: https://api.stormforge.io/
  clientID: ef0a6fd
  clientSecret: AwTG
The last step is to run the Stormforge Agent installation.
helm install stormforge-agent oci://registry.stormforge.io/library/stormforge-agent
  --namespace stormforge-system
  --create-namespace
  --values values.yaml
When implementing Kubecost, at first, you’ll most likely google “How do I install Kubecost?”. You’ll see several articles that show the installation, but the thing is it shows the installation with a Kubecost product key.
To get that product key, you have to contact Kubecost.
If you don’t want to do that, you can instead just install the 100% open-source version.
To install the open-source version, run the following Helm Chart.
helm upgrade --install kubecost
  --repo https://kubecost.github.io/cost-analyzer/ cost-analyzer
  --namespace kubecost --create-namespace
You can ensure the resources are properly running with the command below.
kubectl get all -n kubecost
Consolidating the tools you use into one usable and manageable stack is key for any implementation, and when it comes to overall performance optimization, this three-prong stack makes the most sense to ensure that the application stack you’re running is as efficient as possible.
We use cookies to provide you with a better website experience and to analyze the site traffic. Please read our "privacy policy" for more information.