With the complex and time-consuming nature of managing Kubernetes, the operational overhead and deep technical expertise required puts a lot of strain on engineering teams. Most organizations are struggling to optimize costs, ensure efficient resource utilization, and maintain the scalability of their Kubernetes infrastructure. Meeting the dynamic demands of modern workloads requires new solutions to manage cloud costs, improve application performance and reliability, and remove manual toil.
Amazon EKS Auto Mode was introduced to address these challenges by offering automated node cost optimization in addition to simplified infrastructure management. Enabling Auto Mode on your EKS clusters not only streamlines cluster operations but also continuously optimizes compute costs through intelligent capacity provisioning and dynamic scaling.
When enabled, EKS Auto Mode automatically selects the optimal mix of EC2 instances, terminates unused resources, and consolidates Kubernetes workloads, enabling teams to significantly reduce operational overhead. With support for cost-saving features like Spot Instances, Savings Plans, and Reserved Instances, EKS Auto Mode helps organizations improve Kubernetes cost efficiency.
But to reach peak cost-efficiency, you will need to carefully configure resource requests for each of the workloads deployed onto your cluster. Because EKS Auto Mode’s cost optimization features are powered by Karpenter - accurate workload-level resource requests are critical to provisioning the right EC2 instance types.
To optimize your workload resource requests, StormForge automatically detects all workloads in your EKS Auto Mode cluster and uses machine learning and automation to continuously rightsize them. These optimized resource requests help EKS Auto Mode provision the optimal EC2 instances and keep your costs under control and applications at peak reliability.
To get started maximizing, you just need to deploy the StormForge Agent onto your EKS Auto mode cluster. You can either deploy the Agent using Helm, or you can use the AWS Marketplace Add-on.
AWS Marketplace add-ons for Amazon EKS offer a streamlined way to enhance Kubernetes clusters with validated third-party solutions, covering critical areas like cost management. These add-ons provide simplified deployment, automated management, and consolidated billing, allowing you to quickly integrate essential tools while further reducing operational overhead and benefiting from the latest updates and security patches.
To deploy the StormForge agent onto your Amazon EKS Auto Mode cluster using Marketplace add-ons, you will need:
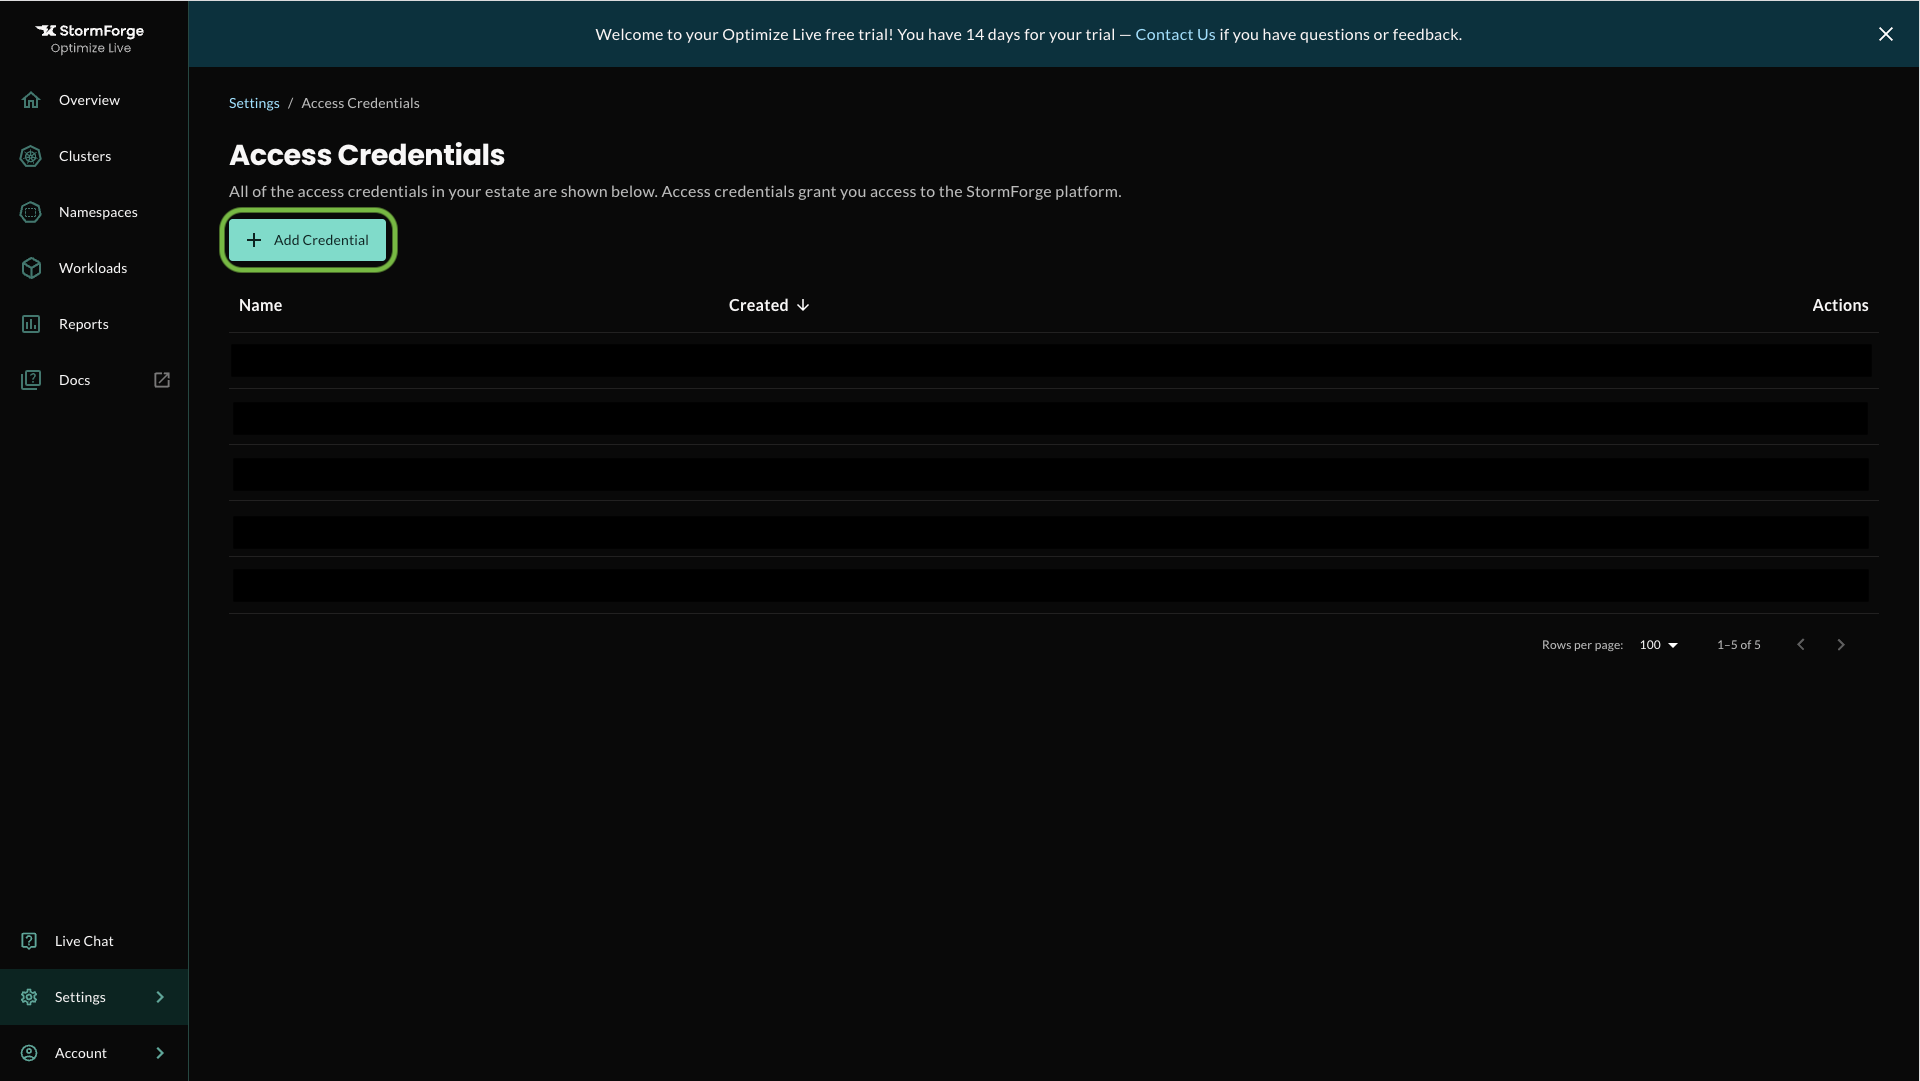
Log into your StormForge account and navigate to Settings > Access Credentials.

Click Add Credential.
Provide a Credential Name and click Create.
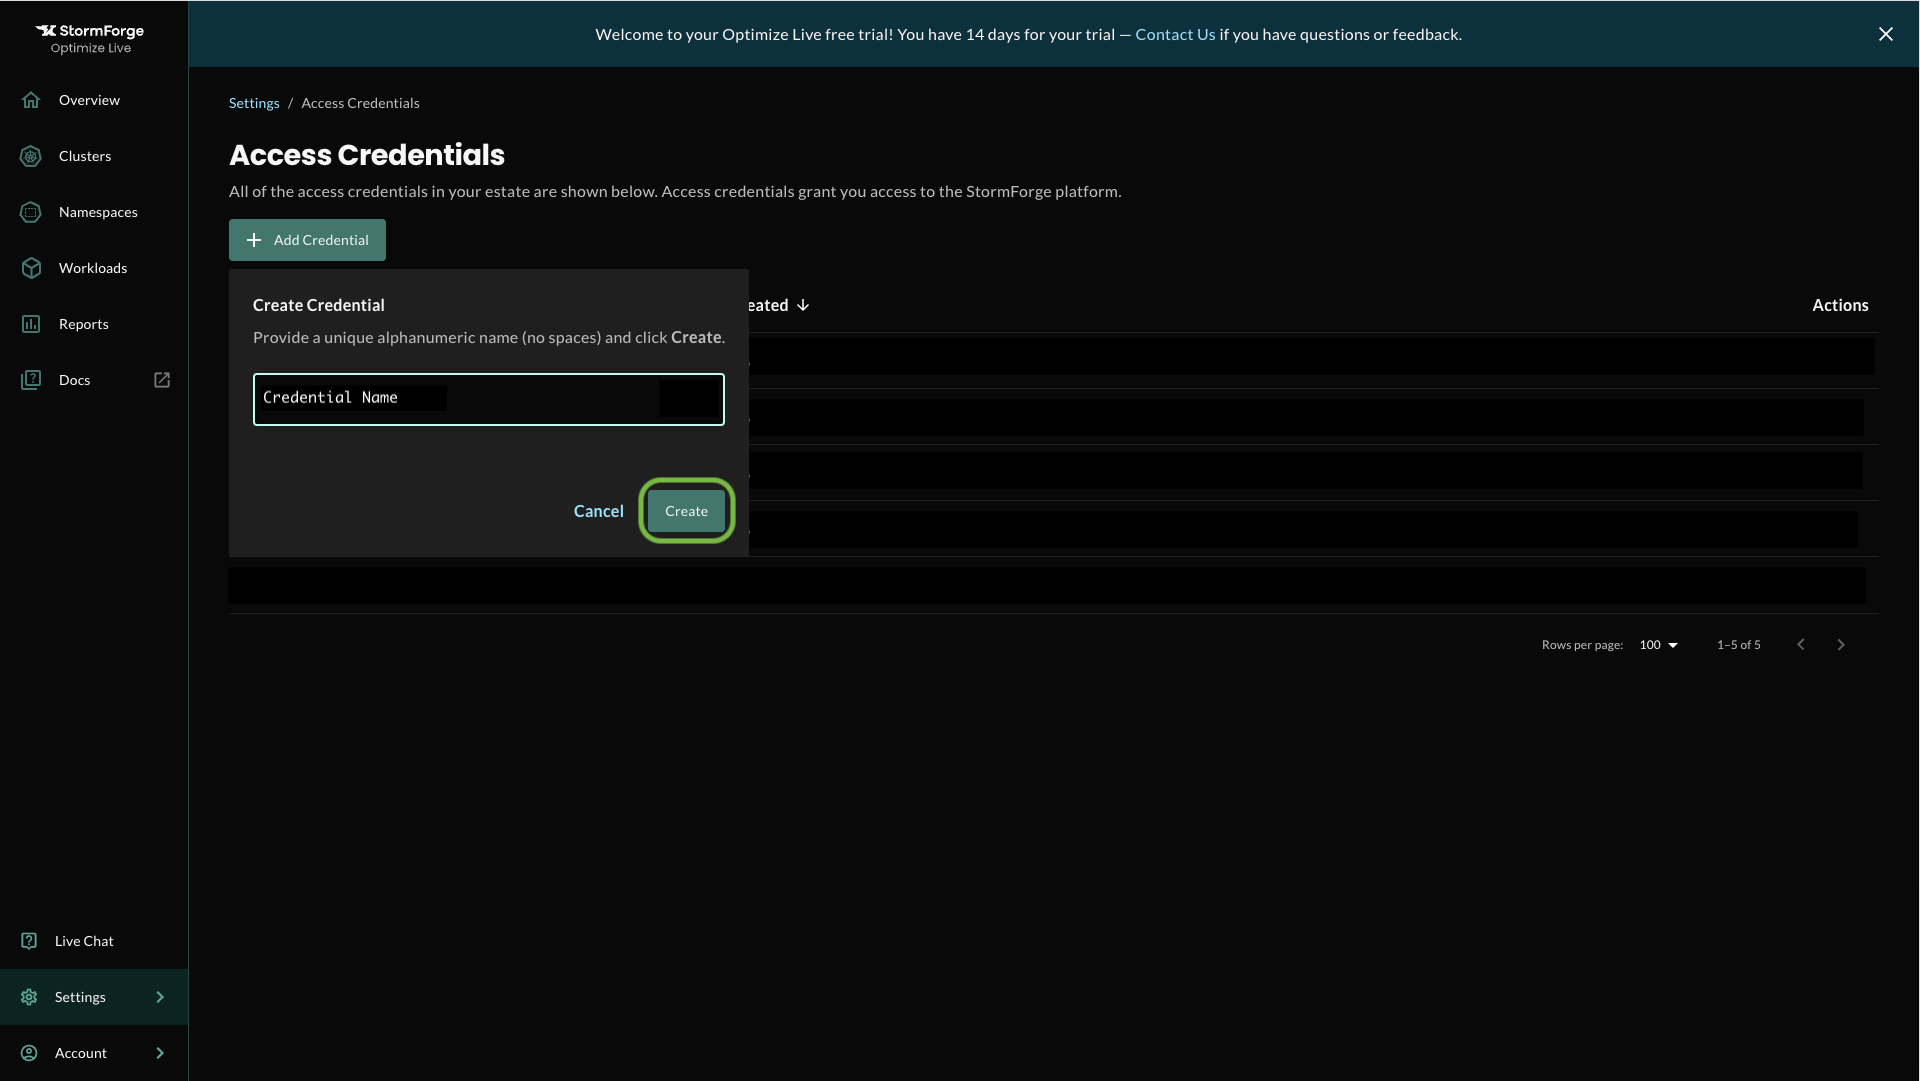
Click to Download or Copy your new credential. You will need it to configure the EKS add-on, which you'll see how to do in Step 2 of this tutorial.
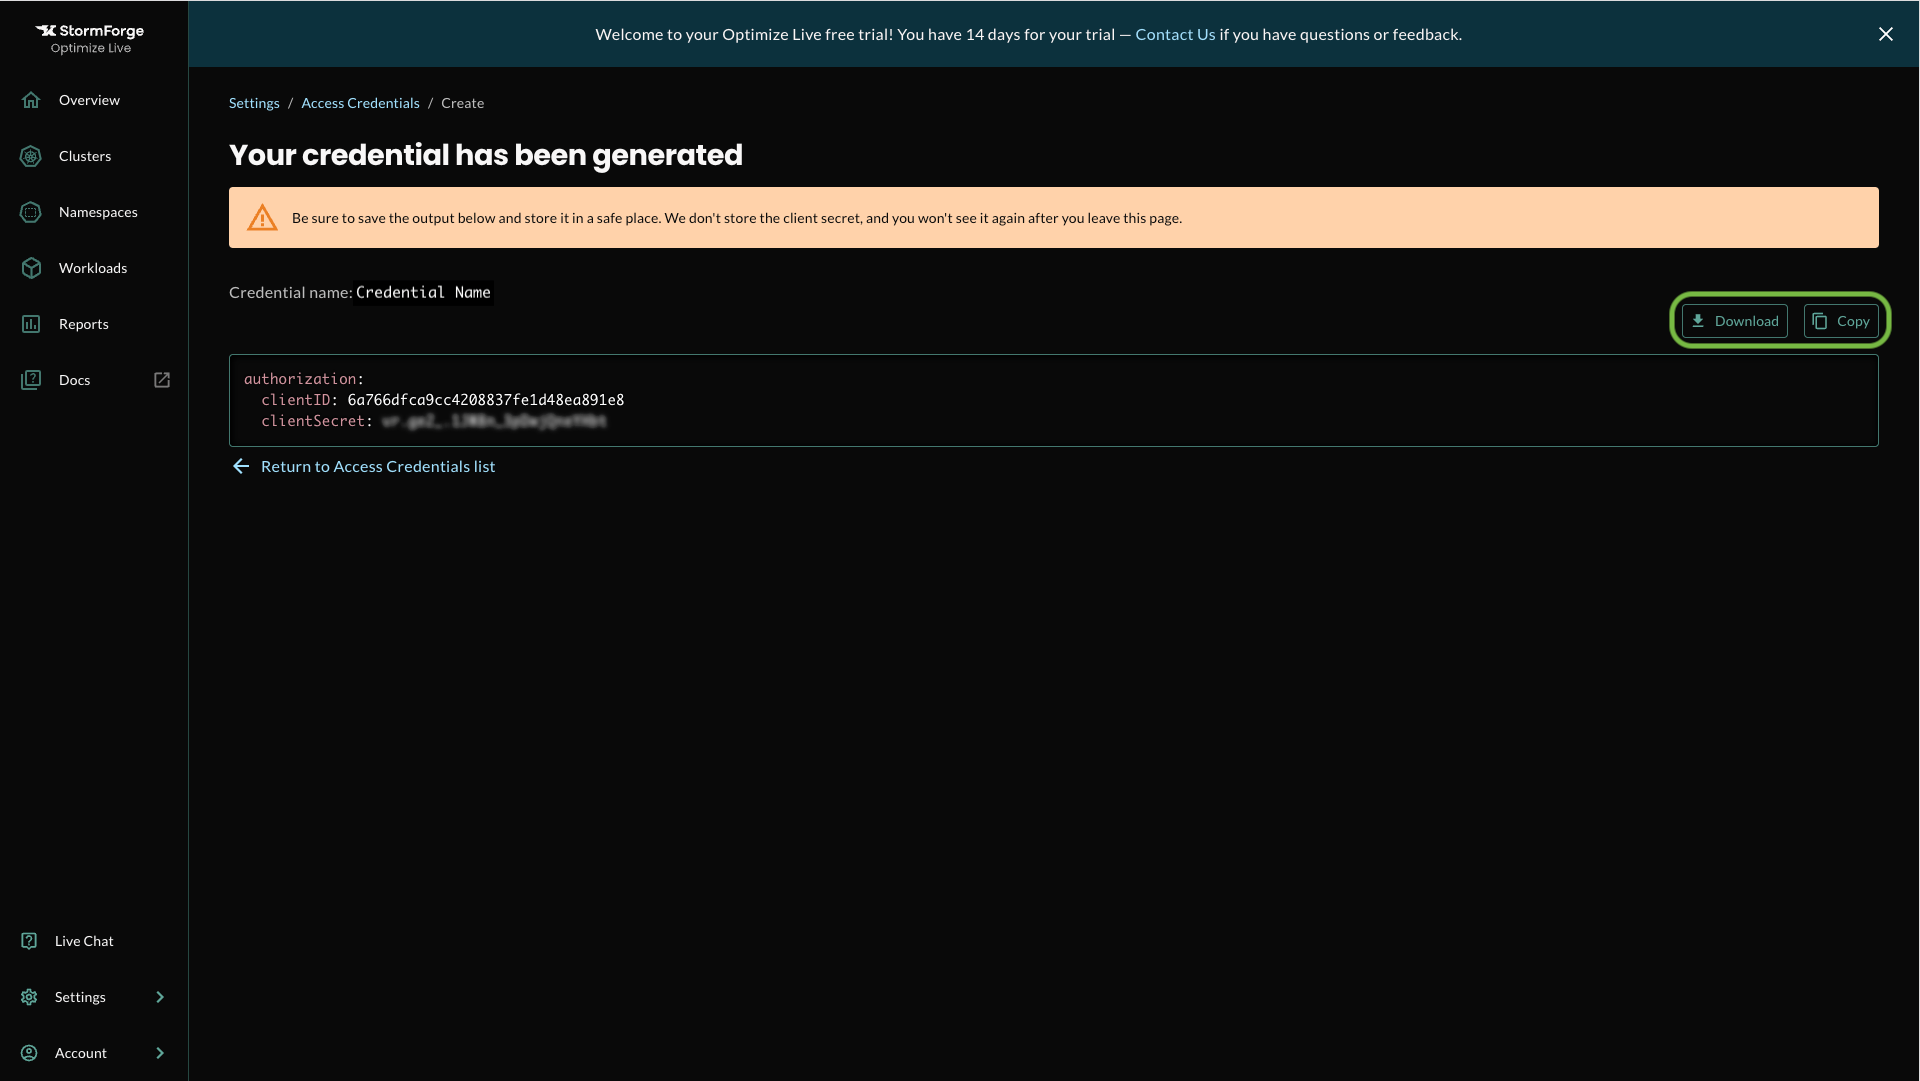
WARNING: Be sure to save the output below and store it in a safe place. We don't store the client secret, and you won't see it again after you leave this page.
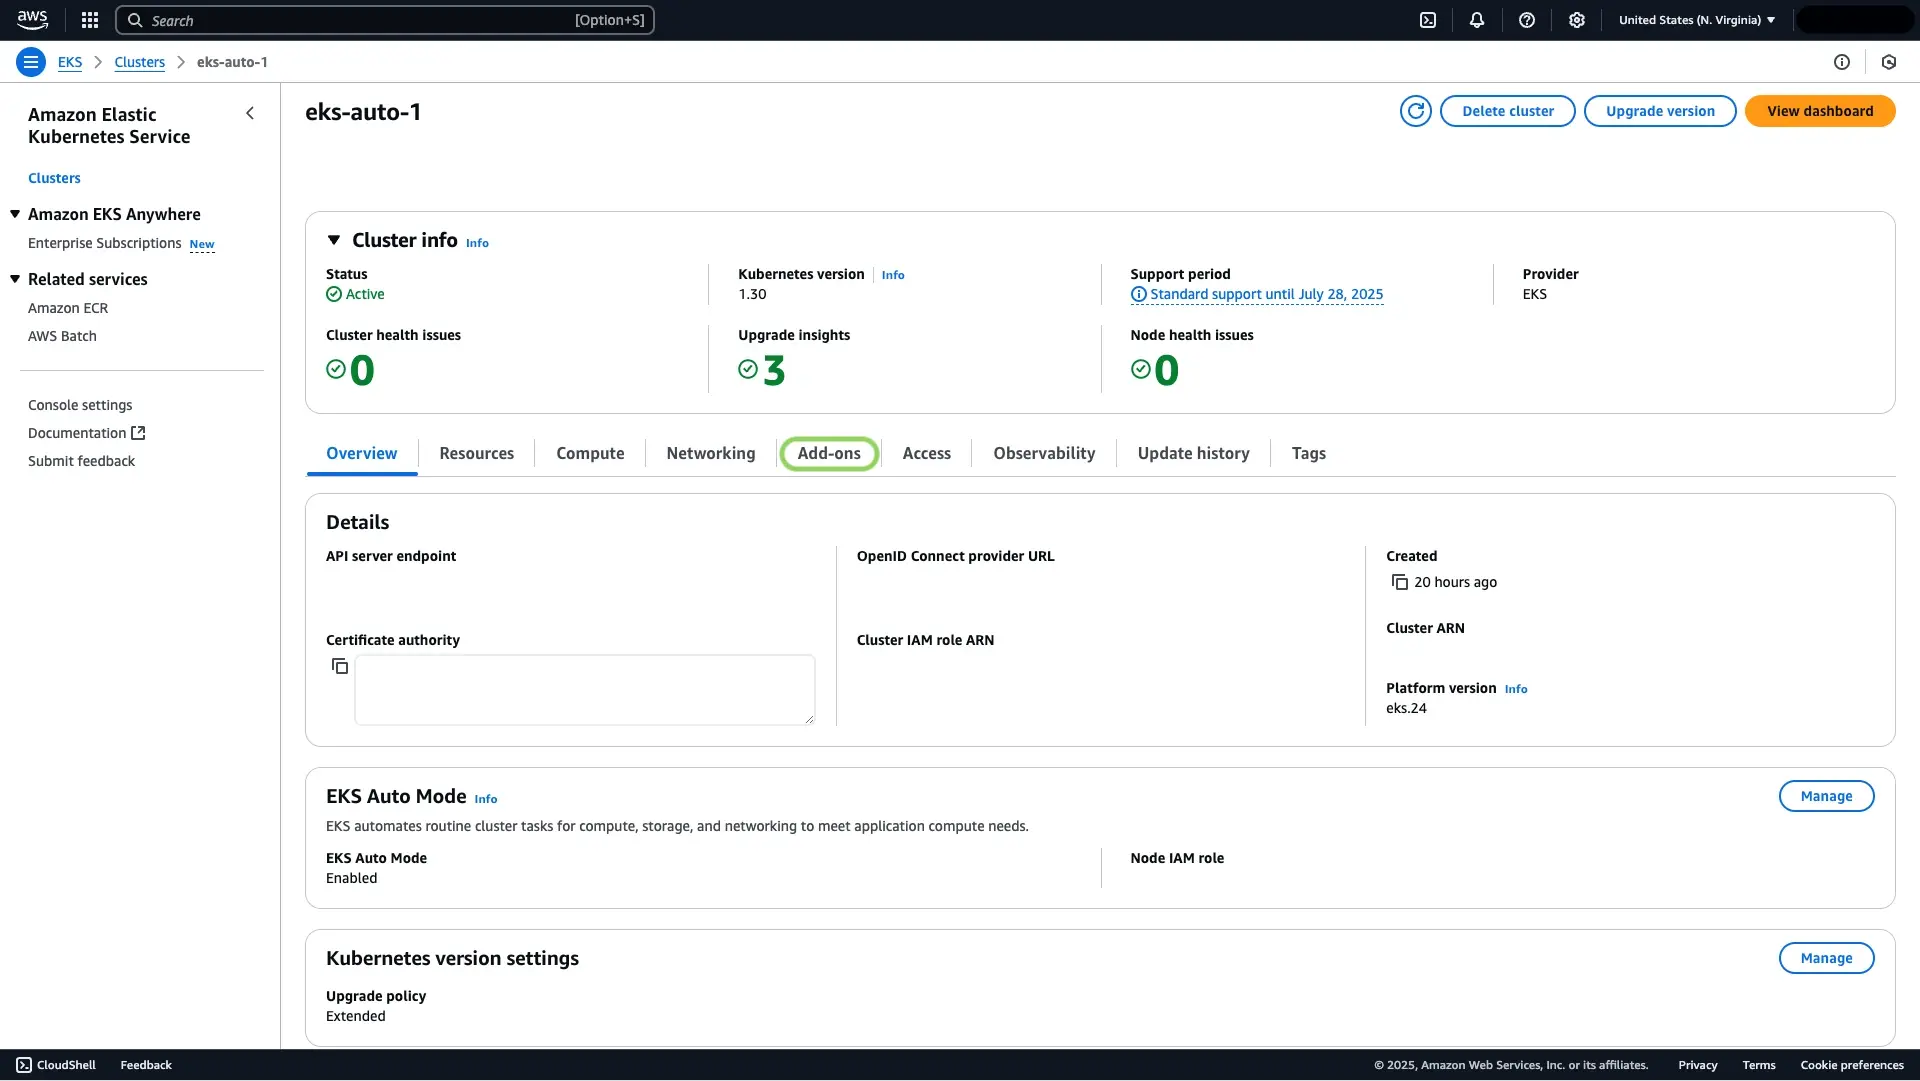
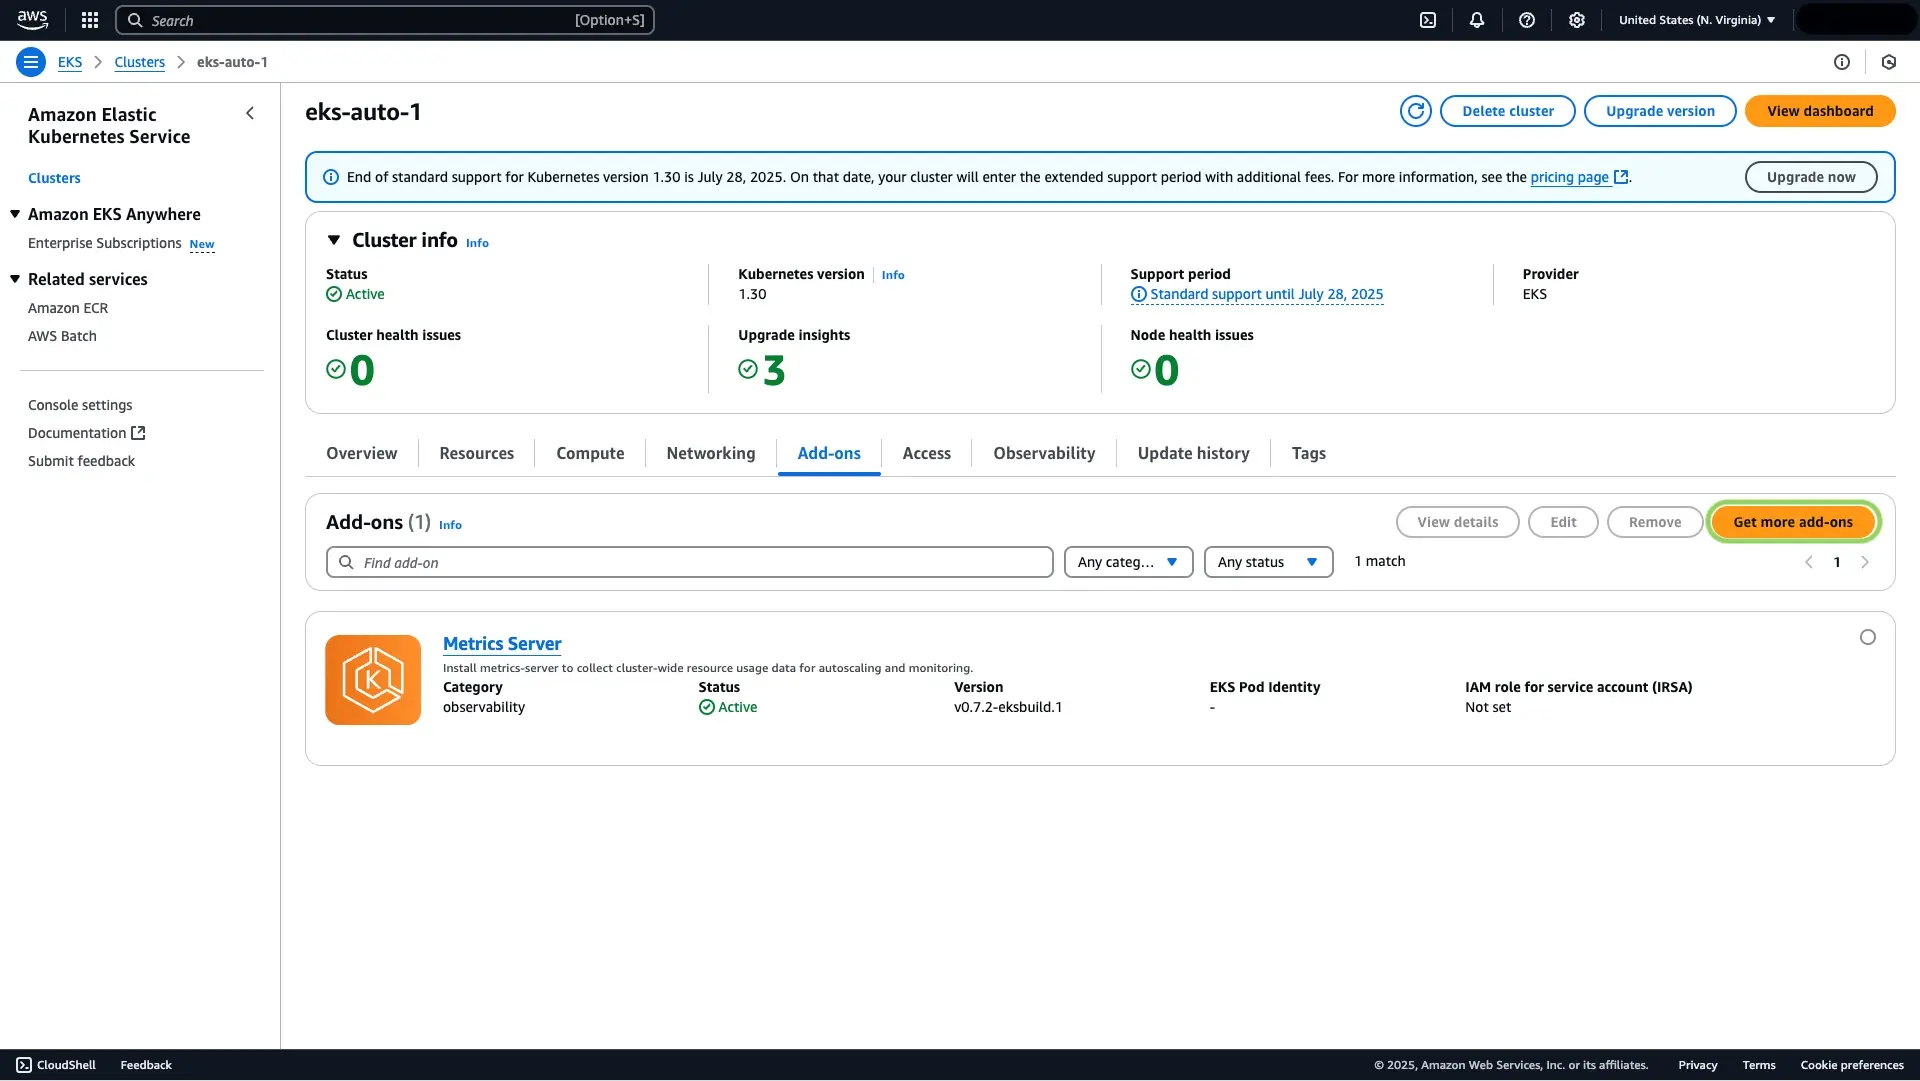
Log into your AWS console, navigate to your EKS cluster page, and click Add-ons.
Click Get more add-ons.
Select the StormForge listing from the list of AWS Marketplace add-ons.
Scroll down to AWS Marketplace add-ons.
Search for “StormForge.”
Select by checking the box in the upper right corner of the add-on listing, and click next.
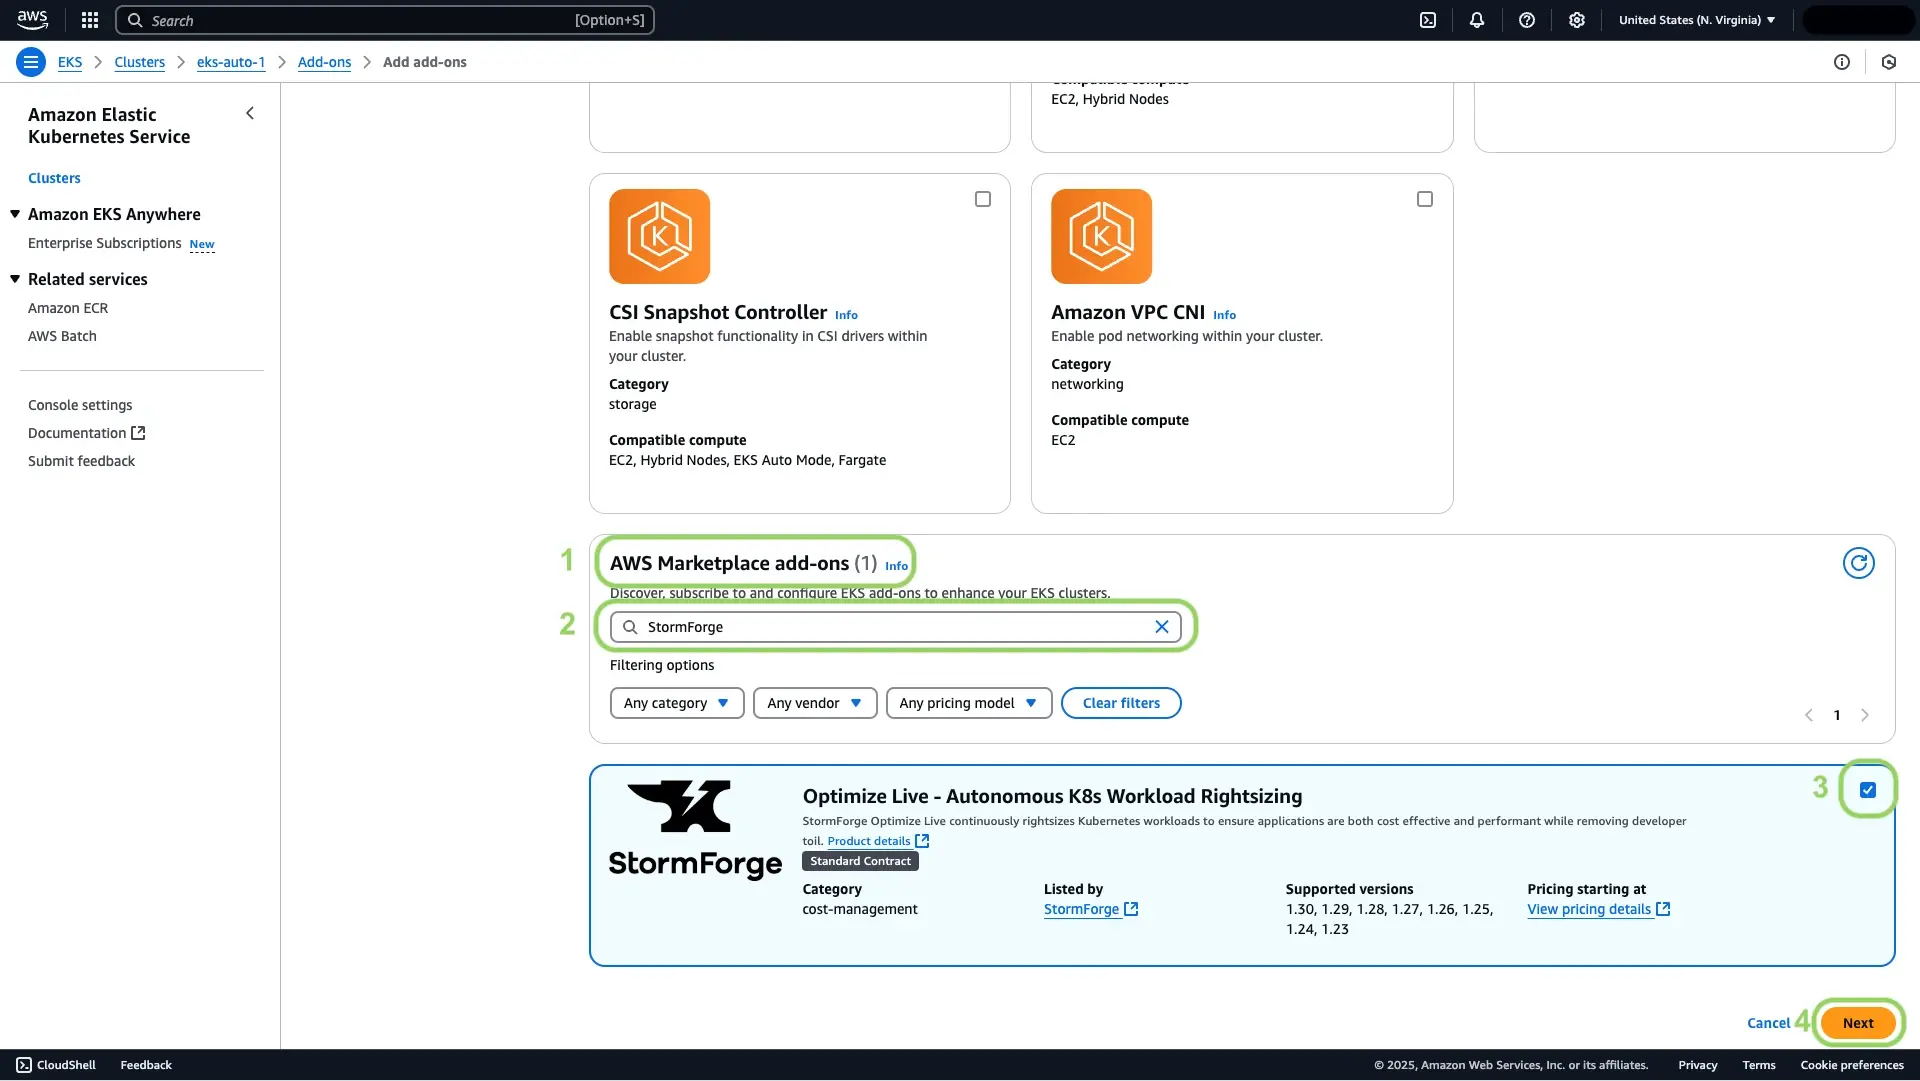
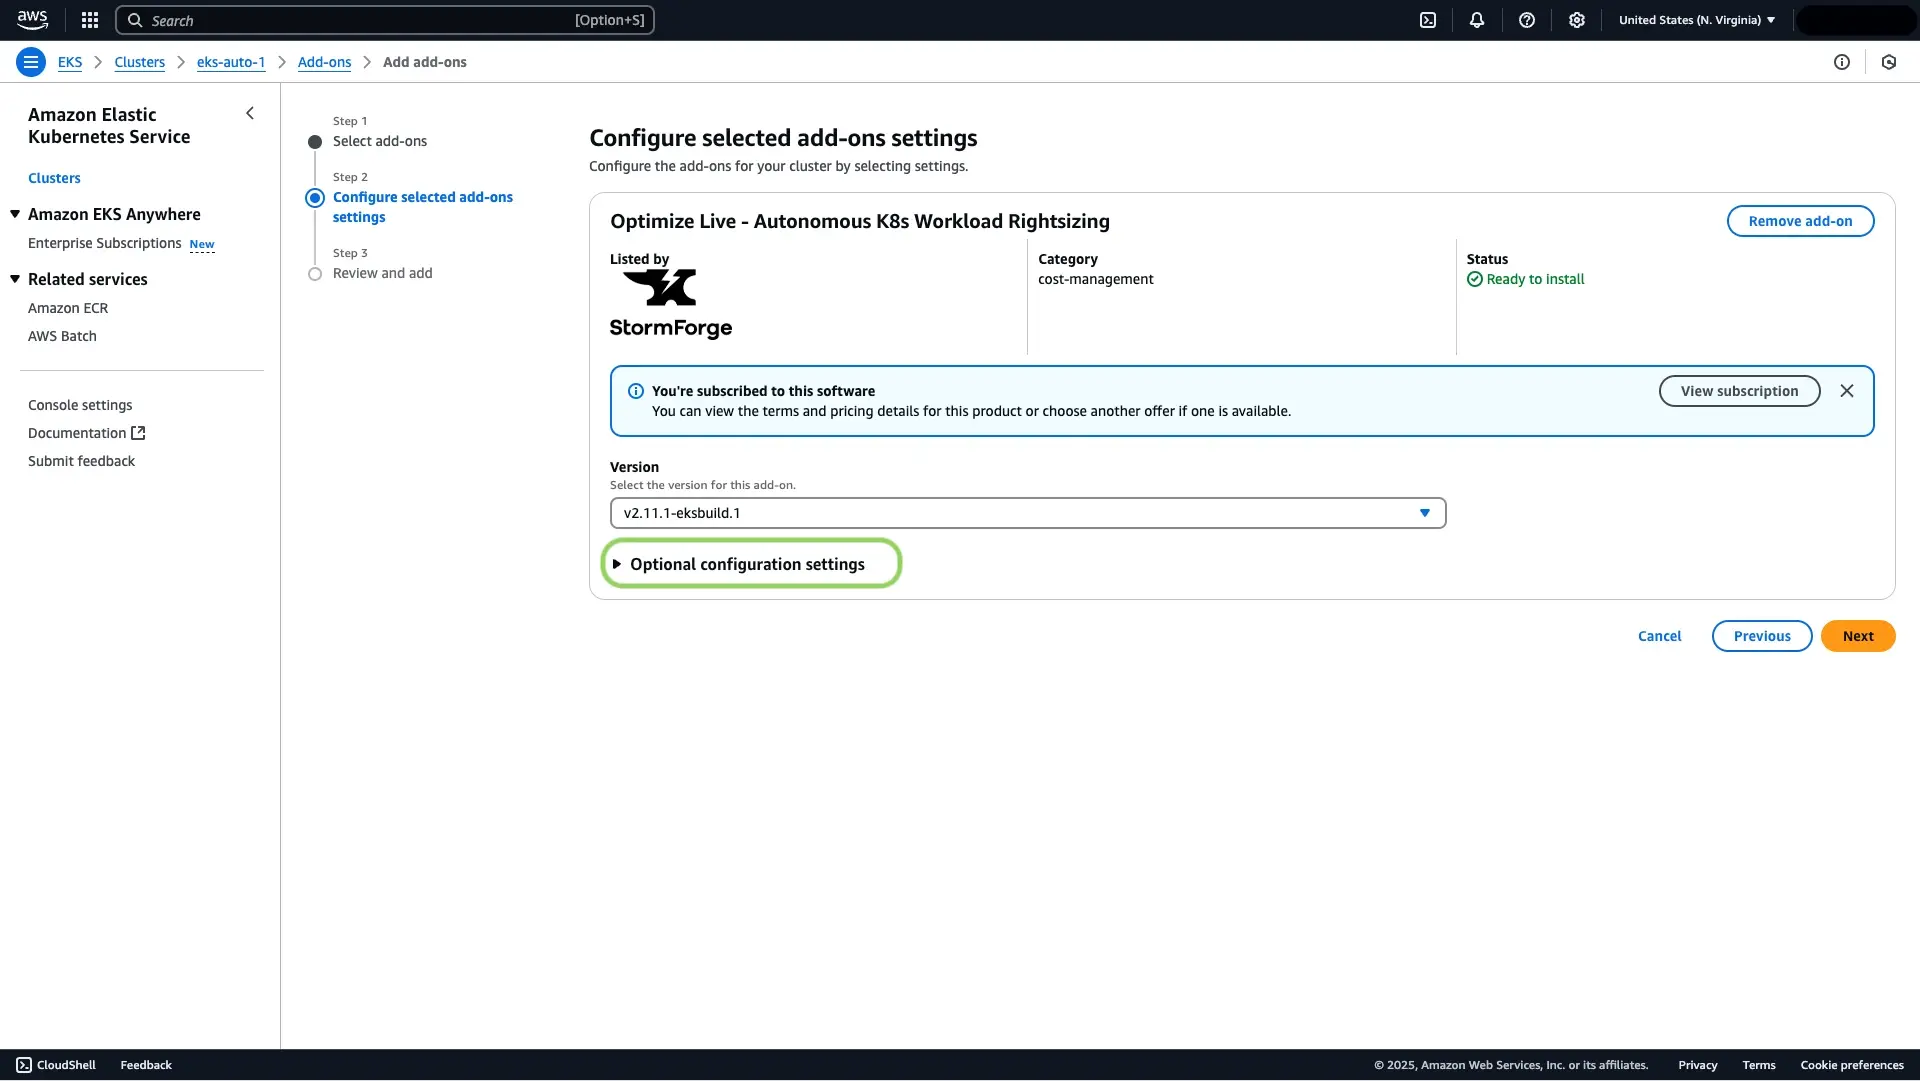
If this is your first time deploying the StormForge EKS add-on, you will need to subscribe to the agent container to proceed. Subscribing to the StormForge agent is free.
After successfully subscribing, locate and expand Optional configuration settings.
Enter the Configuration values from the credential downloaded in step 1 as shown below, and click next.
authorization:
  issuer: https://api.stormforge.io/
  clientID: <string>
  clientSecret: <string>
standbyMode: false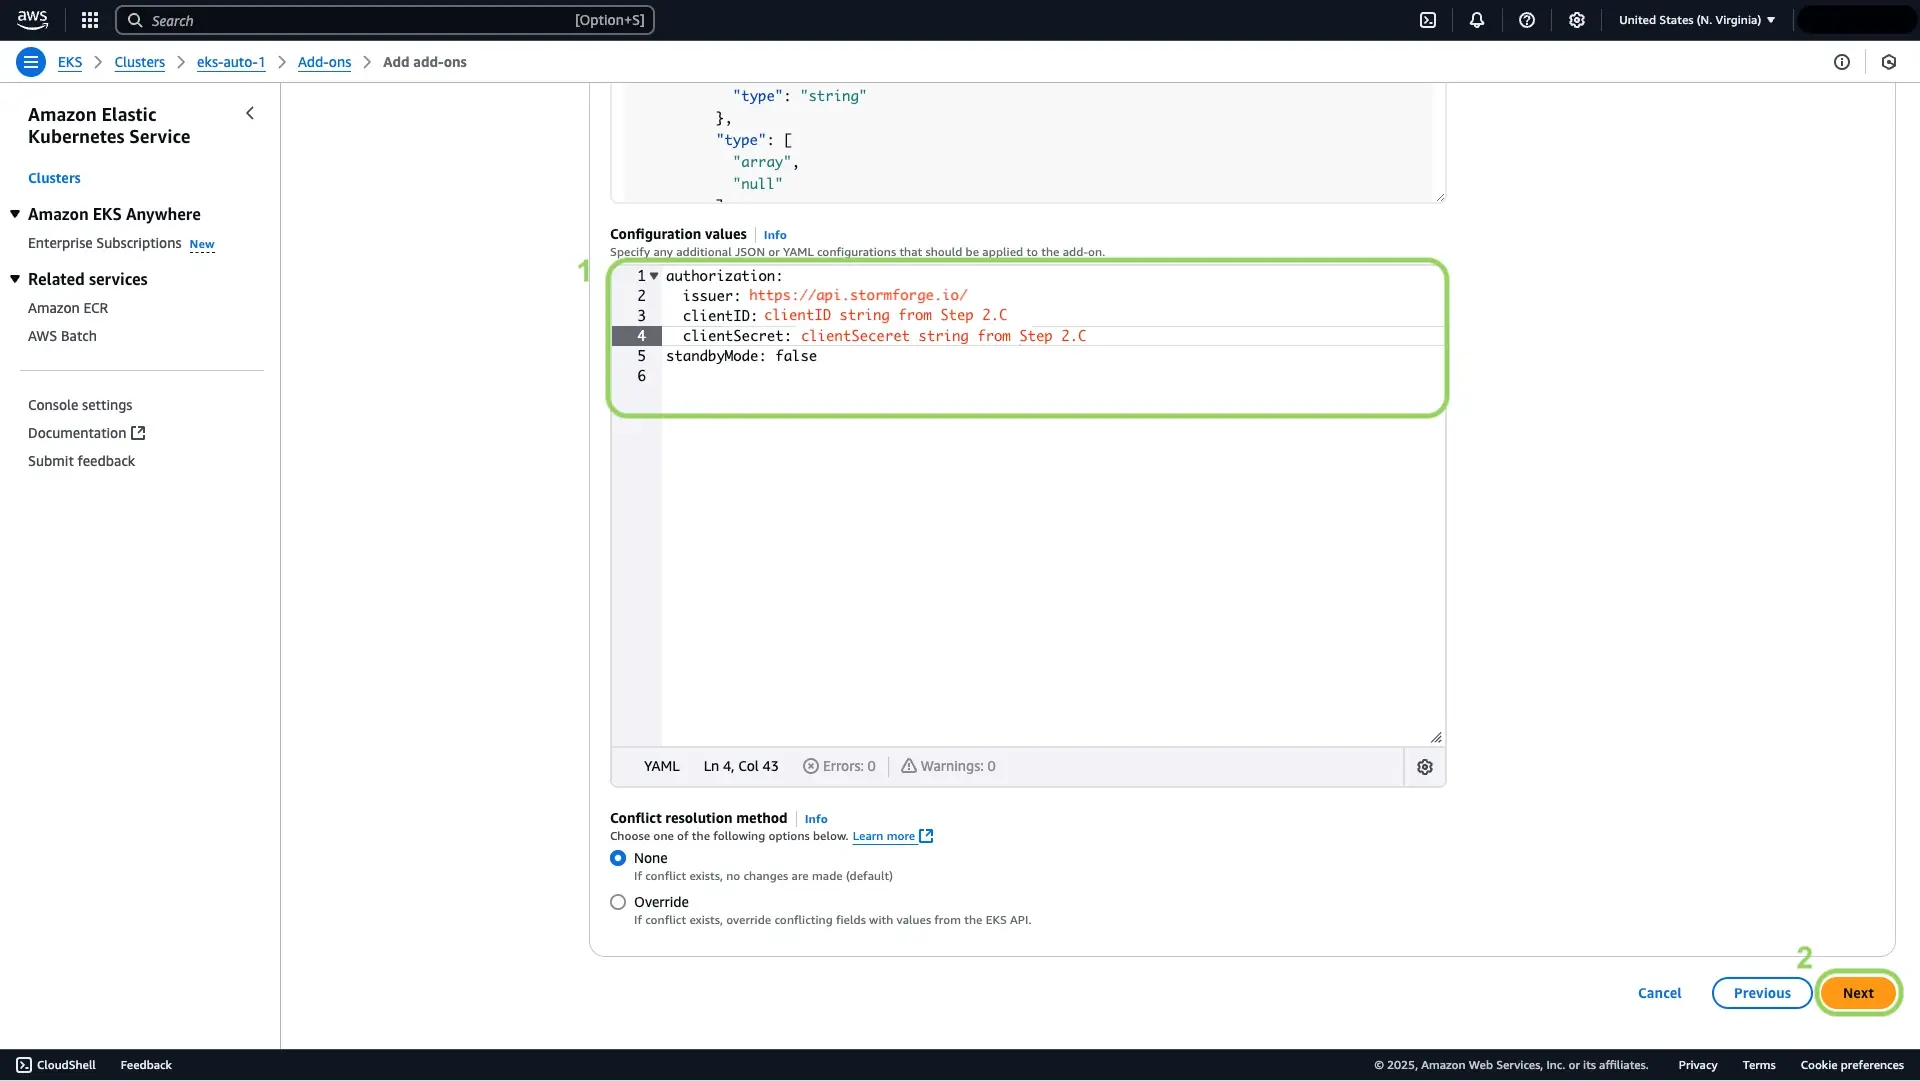
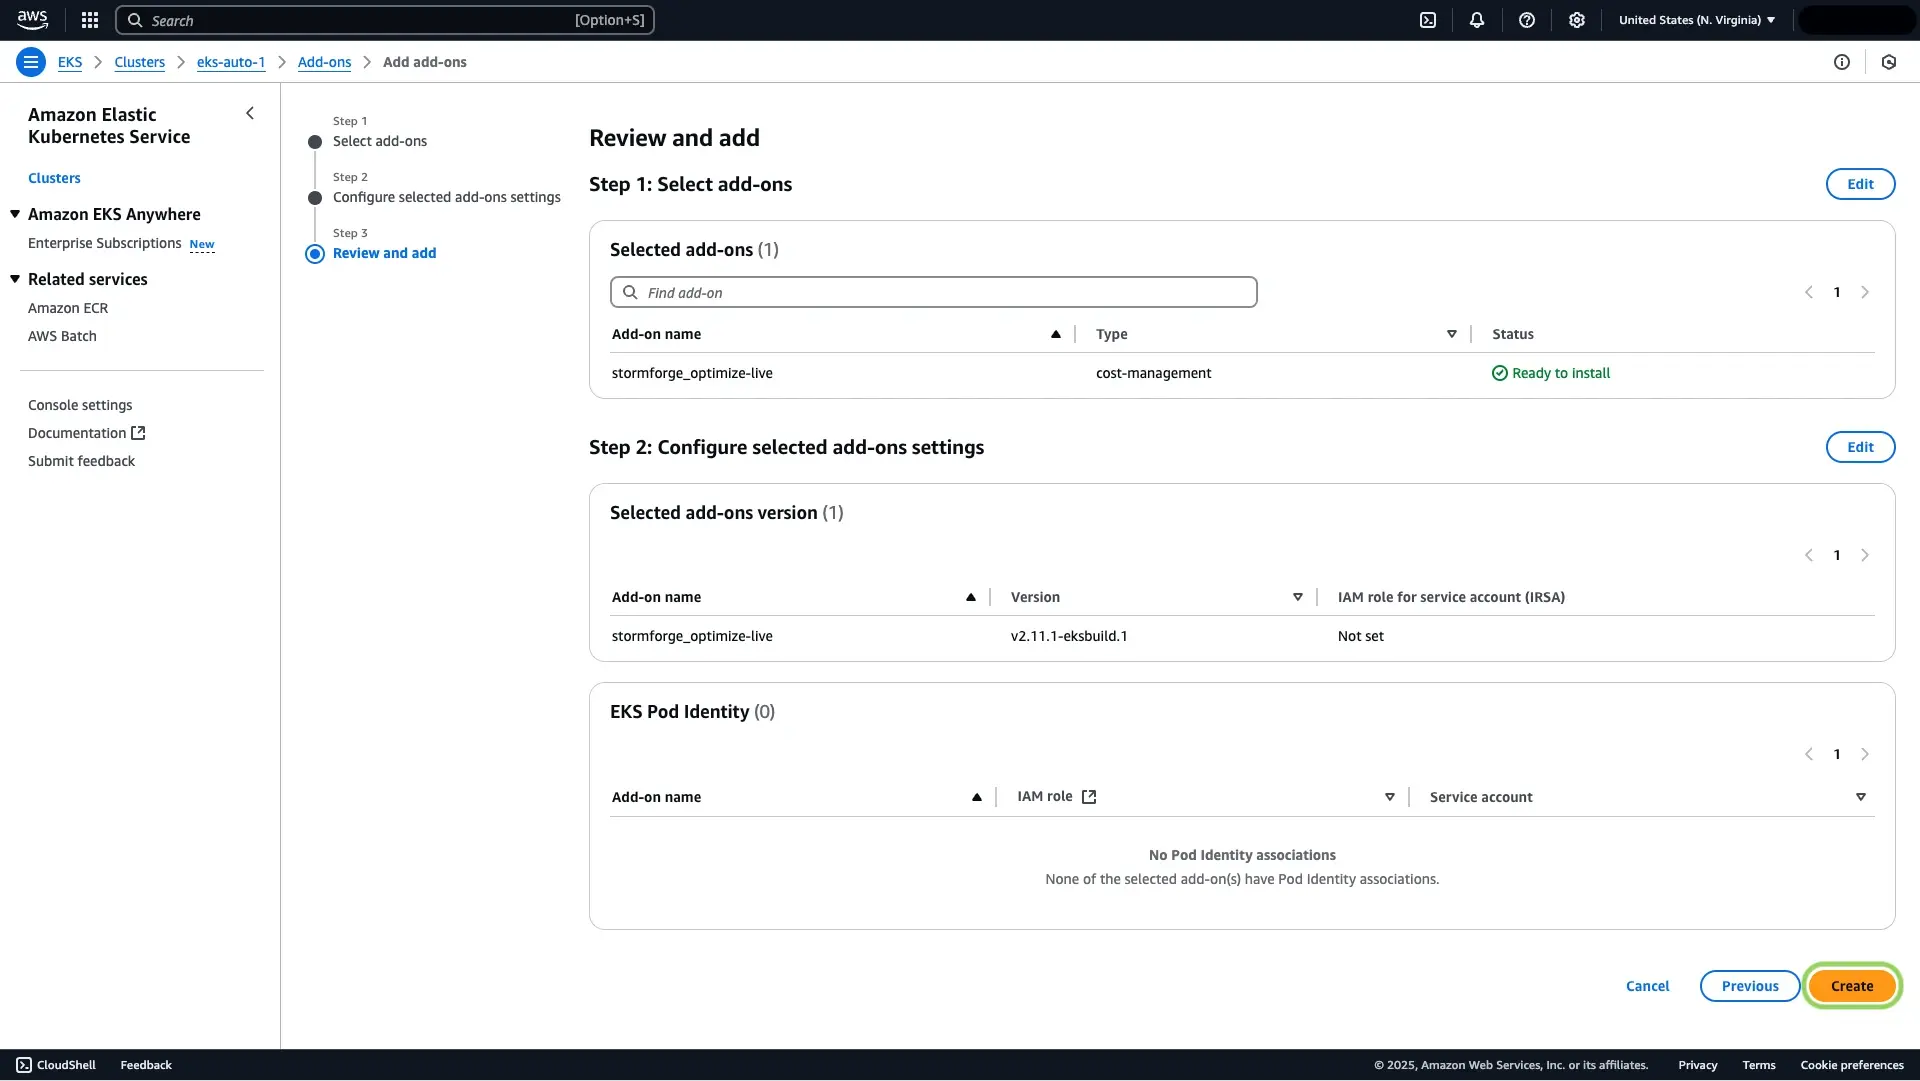
Click Create
You will see a confirmation message pop-up that the StormForge EKS Add-on has been successfully deployed.
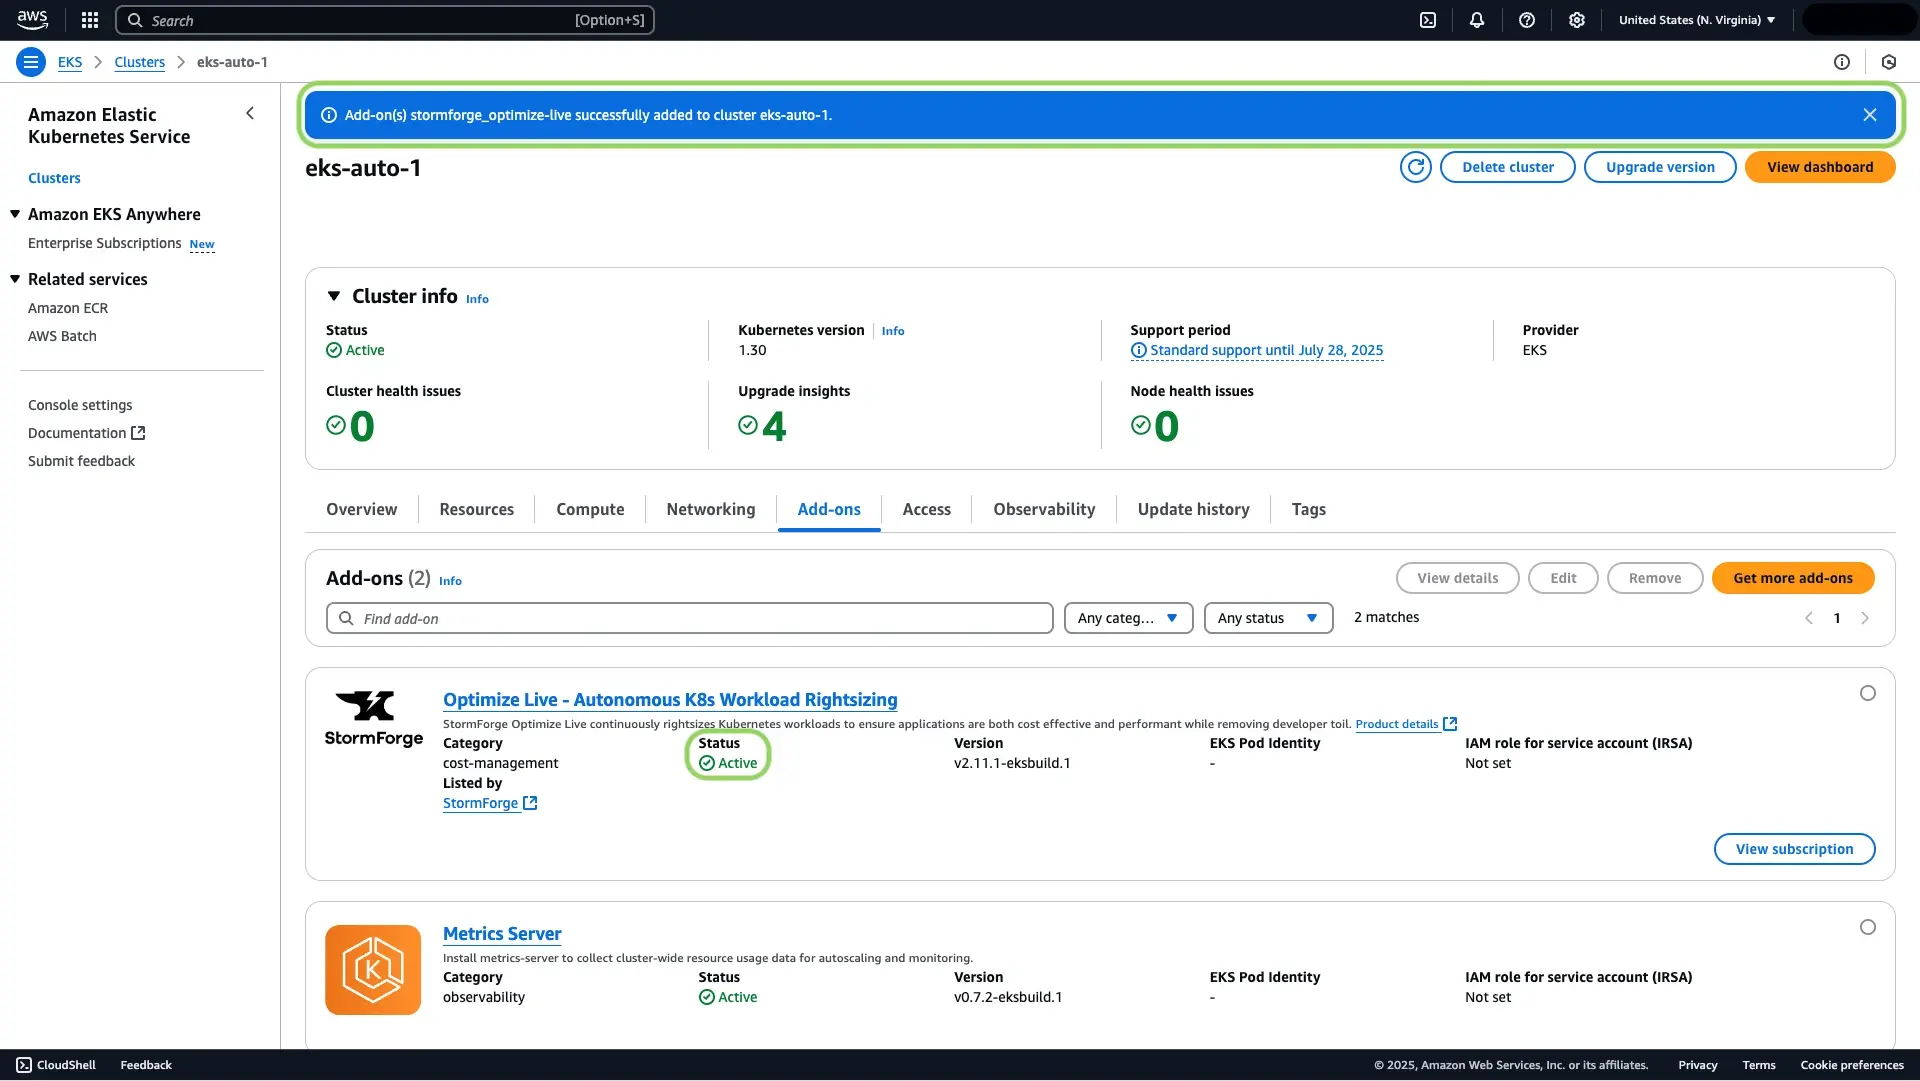
Congratulations! You will now automatically receive rightsizing recommendations for all workloads discovered in your EKS Auto Mode cluster!
In addition to deploying the StormForge EKS add-on via the EKS console, you can also deploy the StormForge EKS add-on via the Amazon EKS CLI tool (eksctl).
To learn more about how to deploy the StormForge Marketplace add-ons via eksctl, see our EKS add-on documentation.
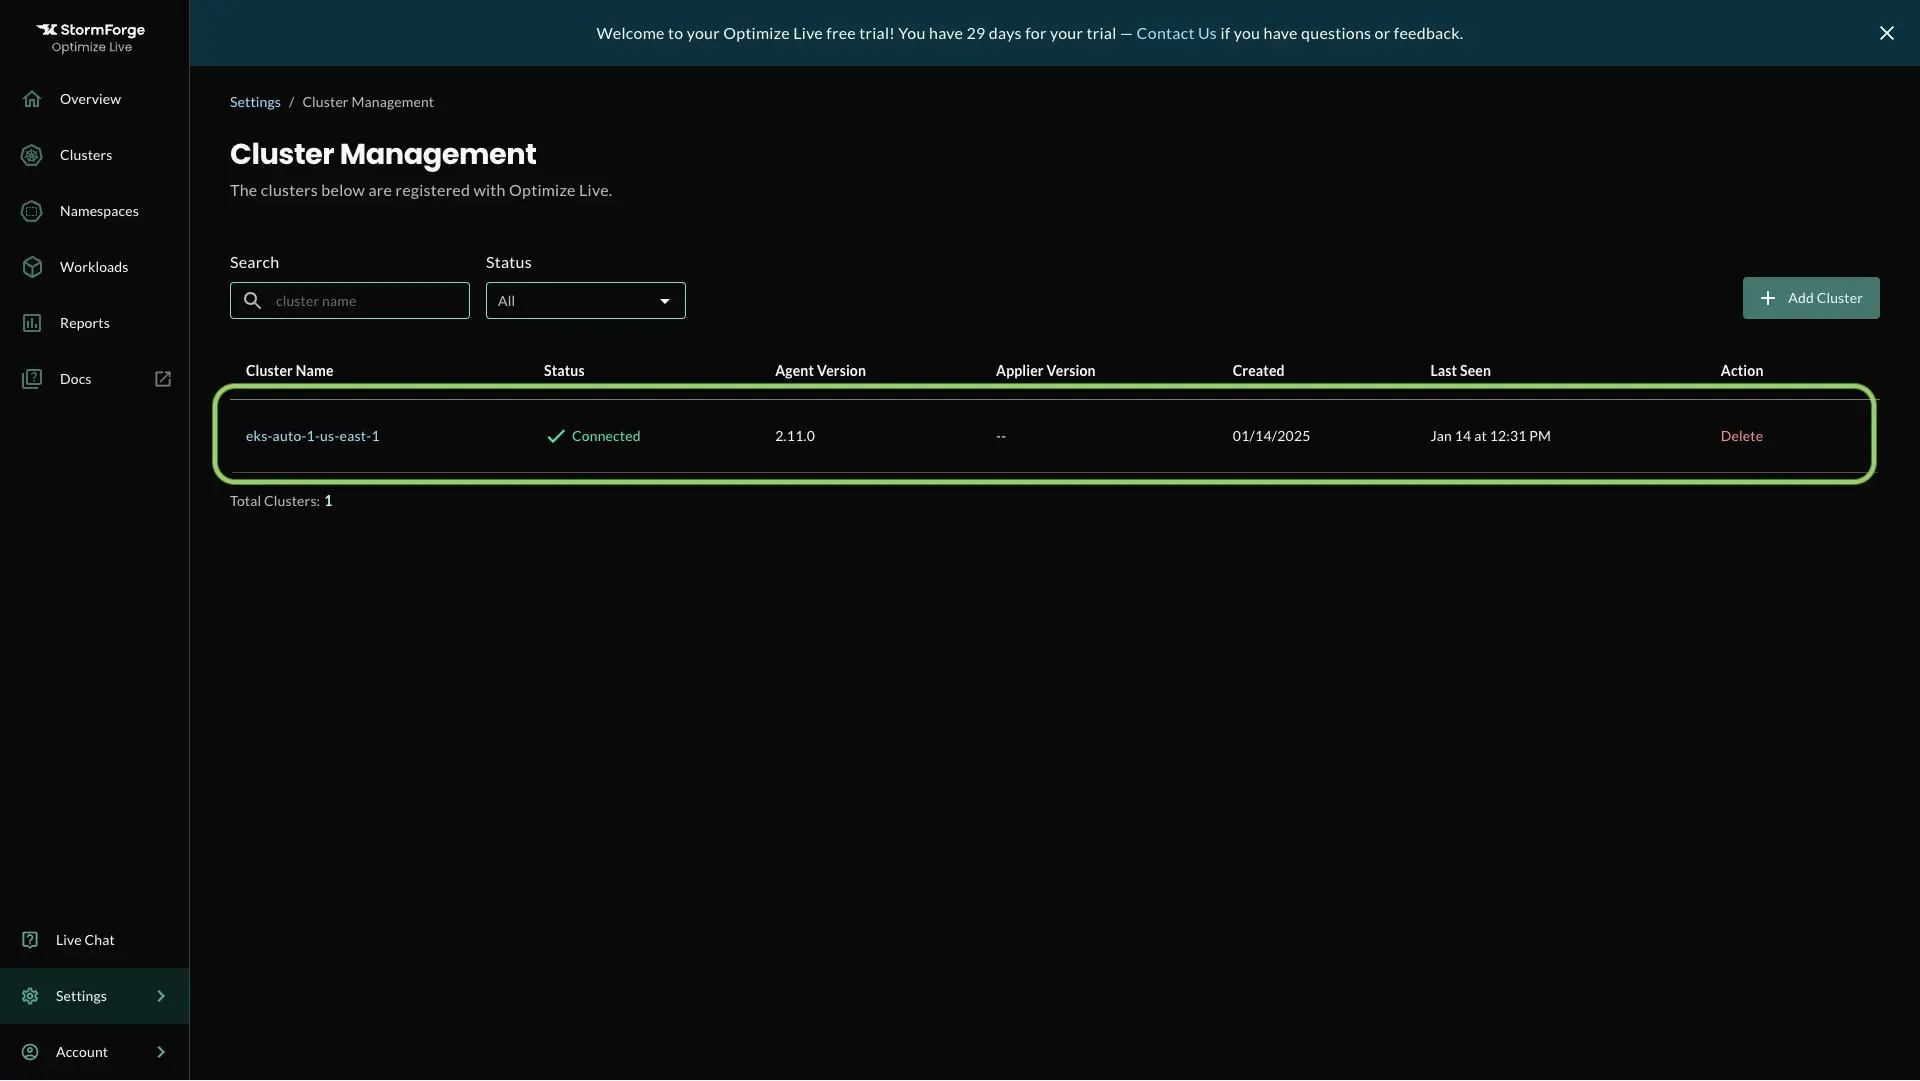
With the StormForge agent successfully deployed via EKS add-ons and your Amazon EKS cluster connected to the StormForge platform, you can quickly and easily rightsize all of your workloads autonomously.
To learn more about how to apply automatic continuous rightsizing of your workloads, visit our optimization settings documentation.
We use cookies to provide you with a better website experience and to analyze the site traffic. Please read our "privacy policy" for more information.